Hello, this is Kyo, a front-end engineer at LINE. I'd like to share my story on AMP Project, Google's open source project. While you work on markup with AMP HTML, haven't you ever felt an urge to make a component yourself, or to add a feature to it? I hope my post will give you a little push on your back if you are still hesitating.

LINE is available on AMP
In May 2018, LINE has been added to the amp-social-share component for sharing content with social media. Check out the following links to see in more detail.
What I'd like to share is the process of committing and creating a pull request for the AMP Project code I've wrote. Note that I am not covering the making of a new component, but adding a feature to an existing component.

How it started
So, how did LINE end up in the AMP project? It all started with the LINE Global Workshop, Let’s Contribute OSS! held in April, 2018. Those of you who've read the article may know already; through the workshop we created a total of 53 pull requests, 33 issues and 16 translated documents. The component I chose then was amp-social-share, for I had a personal interest in it since it was released for the first time in Japan. Also, I've written an article, The things you need to know before using Google AMP No Standalone (in Japanese), in CodeZine's May cover in 2017. If you are okay with Japanese, have a read through. It might be helpful, especially if you are interested in AMP HTML.
Adding an AMP component
My suggestion for making a component and committing consists of the following steps:
Preparation
First, you need to set up an environment to develop a component. Follow the steps guided below:
- Fork the ampproject/amphtml repository.
- Set up the environment, based on the Getting started guide.
# node_modules install nvm install --lts yarn global add gulp-cli yarn install # Run a local server gulp - On your web browser, enter
http://localhost:8000/examples. If you see the following screen, you are ready to go.
Learning the structure
Before starting with the actual, learning the folder structure will help you. The project you forked is composed of a lot of files for components, documents and examples. Check out the following table.
| Folder | Content |
|---|---|
| /.github, /contributing | Documentation to help you |
| /examples | HTML files for you to check if things are working properly |
| /builtins | Built-in components |
| /extensions | Extension components |
| /ads | Code for amp-ads service configuration |
| /3p | Modules to handle third-party services, third-party software and embedding that are included in AMP. For example, modules for Facebook or Twitter SDK are included. |
| /third_party | Third-party modules. Modify optimized-svg-icons to use your icons. |
| /css | CSS to be used other than components |
Developing a component
This is where you actually modify an existing component or create a component. Let me briefly share about the component we worked on, amp-social-share. The folders we dealt with are:
- /extensions/amp-social-share
- Adding configuration to config
- Adding CSS
- Working on documents
- /third_party/optimized-svg-icons
- Adding the LINE icon
Once your work is done, test your work based on the Getting started guide.
Creating a Pull Request
When you create a PR for the AMP project, you need to put a label with an emoji in front of your PR title. I strongly suggest you to check out the Pull Request Template before creating anything.
When you create a PR at amphtml, the following four tools are used for continuous integration.
- cla/google
- lgtm analysis: JavaScript
- percy/amphtml
- continuous-integration/travis-ci/pr
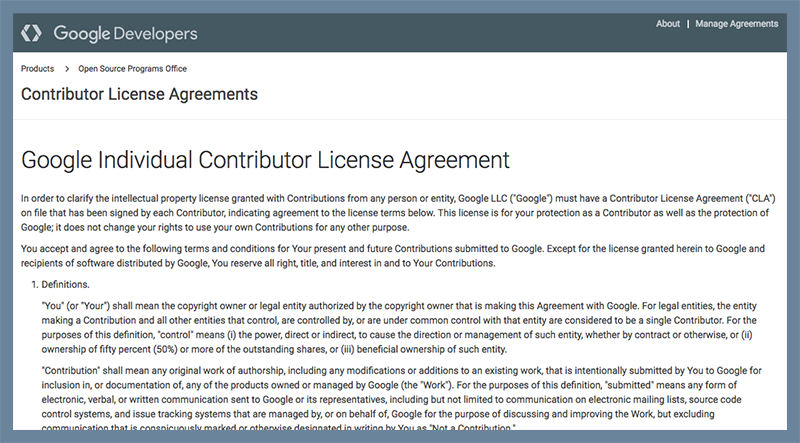
If you merge to the latest master branch, it will be okay. However, if this is the first time ever for you to commit to a Google open source project, you are going to bump into an issue at the cla/google stage. This stage checks whether you have agreed to Google Individual Contributor License Agreement. To sign up the agreement, go to the Contributor License Agreements page and follow the instructions.

- Click the Management your Agreements button at the bottom of the page.
- Click the Only Yourself button.
- Enter required field such as email address or GitHub account and then press the I Agree button.
- Check the email address you registered on GitHub. Check that all the email addresses set for
config users.emailare registered. Avoid working with different email addresses on different computers. - Write a comment on the PR and save it. This will resume with CI. Once CI and code reviews are complete, that's it.
Release
For you commits to be applied in the official release, a minimum of one to two weeks are required due to the distribution process. It is said that about billions of pages are written in AMP HTML. Imagine what'd happen if we distribute changes carelessly without thorough checking. So, to determine whether to apply your patches in the official release, about 1% of AMP HTML pages are tested with the your patch. This is why it takes a few weeks for your patch to be released after having it merged to the master branch. You can see the progress status at amphtml/releases. See Release Schedule for more information.
Ending notes
So, I've shared my experience on creating a PR for the AMP Project which I hope was helpful to some of you.
Lastly, I'd like to let you know that LINE is hiring front-end engineers for various services. See the following links if you are interested:
- Front-end engineer - Tokyo
- [LINE Financial] (Fintech) Front-end engineer - Tokyo
- Front-end bridge engineer - Tokyo
- Front-end engineer - Kyoto
- [LINE PLUS] Web Frontend Engineer (Blockchain Platform/Service) - Korea
